RADIOGRAPHIC inspection (RT)
TEC Eurolab
Non-destructive radiographic inspection(RT)
Verify the suitability of your product with 2D industrial radiography
Welcome to TEC Eurolab radiographic HUB
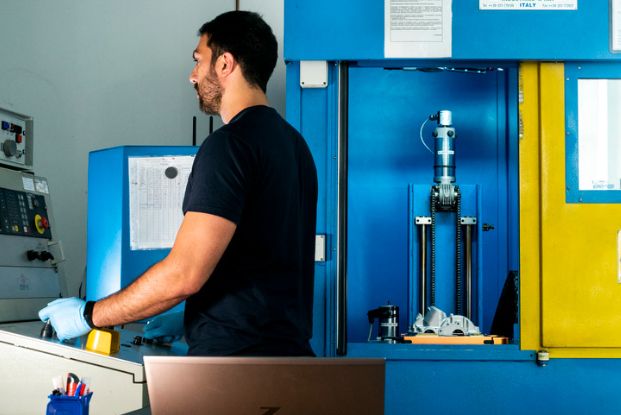
The area, located within the NDT Business Unit, combines 2D and 3D X-ray technologies to enable the best investigation depending on the type of component, manufacturing process, and final output required.
The HUB has 2 2D radiography systems of 160 KV and 320 KV to which film or digital systems (Computed Radiography and Direct Radiography) can be combined.
With TEC Eurolab, you can always have the best tool to achieve the final goal of the analysis and meet the required quality requirements.

WHAT DOES THE RADIOGRAPHIC INSPECTION (RT) CONSIST OF?
Radiographic inspection (identified by the acronym RT), by sending X-ray radiation through a material, is able to detect discontinuities within, on or near the surface. Radiographic inspection, regardless of the technique employed (FILM or NO FILM) provides, as an output, a projection on a 2D plane of the entire volume traversed by radiation. RT control particularly excels in detecting discontinuities parallel to the direction of propagation of the ionizing beam.
The presence of a discontinuity is highlighted as a darker area (greater radiographic blackening) than the surrounding background, in the case of a void (porosity, cavity, lack of melt, missing layers) or in the case of less dense inclusion (e.g. inclusion of slag in a melting process). On the other hand, discontinuities are observed as lighter areas (less radiographic blackening) than the background in cases where their density is greater than the surrounding matrix of material.
WHERE AND WHEN IS CONTROL WITH RADIOGRAPHIC INSPECTION(RT) APPLIED?
RT control has no particular application limitations except for:
- Thicknesses to be traversed: the greater the thickness to be traversed, the greater the power required to obtain an image that is in radiographic quality
- Placement of discontinuities: discontinuities oriented perpendicular to the direction of propagation of the RX beam are difficult to detect
Including these two points, RX inspection can be applied to numerous materials and manufacturing methodologies. In the case of metallic materials, X-ray inspection finds its main applications in the inspection of welded joints, cast products, or components made by additive technology.
The growth of Additive Manufacturing, and its increasing use in structural areas, including for nonmetallic components (plastics/composites) makes RT inspection widely used to search for unmelted layers, gas bubbles or cavities due to incorrect injection/cooling process.
The ability to traverse numerous materials by representing them with different gray values also allows the RX control to be used to verify the placement of components that are not directly visible or accessible. This type of application is particularly useful in the analysis of electronic products where the features to be detected are often hidden or cannot be inspected by other methodologies.
Do you need a non-destructive test with the radiographic inspection?
TEC Eurolab can carry out
the tests you need.
DISCOVER MORE
Insights
TEC Eurolab has 2 x-ray sources for performing radiographic controls (RT).
FAQ – CONTROL BY RADIOGRAPHIC METHOD
Should Non-Destructive Testing be carried out by qualified personnel?
Yes, the UNI EN ISO9712:2012 standard accurately specifies the expected number of hours for staff training, depending on the method. Each method has three levels of training: level 1 is provided to become an operational technician in the method; level 2 is provided for the technician with a purpose of guiding the technicians in level 1 and thus gives a thorough knowledge of the control methods; finally, level 3 presents a high, practical and theoretical knowledge of all control methods. Achieving levels in non-destructive testing methods requires a specific training process that ends with a certification exam.
Having to perform nondestructive volumetric inspection, is it better to go for radiography or ultrasonic inspection?
No method is better than others – there are methods better suited to detect a certain type of discontinuity than others. In case a laminate is to be checked, it is preferable to perform an ultrasonic check since characteristic discontinuities are favorably oriented for detection. When inspecting a casting, considering the surface geometry and characteristic orientation of discontinuities, it will be preferable to opt for radiographic inspection.
Is it possible to investigate plastic materials with radiography?
Plastic materials are very transparent to x-rays, so x-ray inspections are possible. For denser materials (copper alloys, lead) radiography is difficult, whereas with tomography you have more reliable analysis. Even for plastic materials, tomography is a more comprehensive and effective analysis than X-ray alone, because it is possible to investigate internal anomalies (e.g., injection and molding problems) or to extract the surfaces of artifacts by comparing them with the design CAD drawing.
TRAINING
TEC Eurolab Academy 2023 Scheduled Courses
Are you planning your company’s technical training for the new year?
TEC Eurolab Academy is pleased to share the 2023 CALENDAR, with the rich proposal of technical training offered by TEC Eurolab.